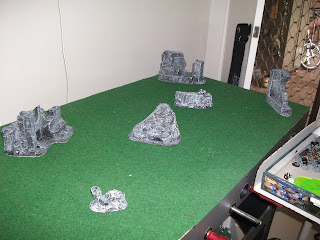
Ruins make some of the most memorable moments of playing Warhammer 40k. Their unpredictable shapes and sizes could make the difference between winning and losing.
Knowing Ruins were one of the most popular pieces of terrain, I decided to post my technique for building and painting them.
What you will need:
·
Styrofoam
This is just your ordinary packaging Styrofoam you would find in the box of an electronic appliance
PVA Glue
Nothing Special, any PVA Glue will work
·
Pollie Filla
This product is made to fill in the gaps of a wall left by pins or nails. Any similar product will work as well
·
Cardboard
Preferably shoebox cardboard. Remember this is for the base of the Ruin, so it shouldn’t be too thick.
·
Ordinary Sandpaper
This is only to sand down the Styrofoam, so it doesn’t have to be too strong
·
Black and White Paint
I just used ordinary craft paints. There’s no need to go using the expensive GW Spray Can!!
·
Sand
I actually got my sand from the park across the road from my house. I use it for the bases of my minis and I really enjoy it.
As you can see most of these Items can be easily found around the house. These ruins can be made in a very short amount of time; I made five in just one Morning.
STEP 1:
Start by finding the right piece of Styrofoam, It can be as small or as large as you want, there’s really no limit to your imagination.
STEP 2:
Once you’ve made a choice, sand down the whole piece with your sandpaper. Styrofoam tends to be weak, and when it comes time to paint it, parts start falling off, which is a real nuisance.
STEP 3:
Cut the piece of card board to an appropriate size to fit the Styrofoam. Then simply glue the base to the piece of foam (with PVA Glue) and wait for it to dry.
STEP 4:
Cake the whole piece of foam with the Pollie Filla to texture it. Then glue the sand to the base using the PVA Glue. This will give it a nice authentic look when painted.
STEP 5: Painting:
1. 1. Basecoat the whole ruin (including the base), with Black Paint
2.
2. Then mix 1/10 Black and White, and apply this mixture to the ruin and the base with a light drybrush
3.
3. Then mix an extremely (almost white) light grey and drybrush this onto the ruin and the base
You don’t have to paint it grey. I have a grass gaming table and grey contrasts really well with green. You could paint the ruins like the ones over at Steevo’s Wargaming Adventure with that sandy desert look. As I said there’s really no limit to your imagination.
 |
| These are all the ruins I've Made. |
That’s all for now…
Clive
