Tuesday, December 6, 2011

Painting Update: My first Trukk


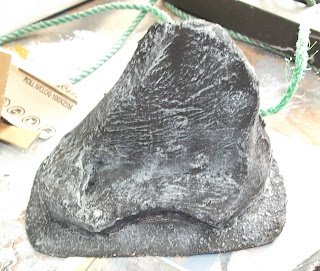
Hey guys, I just recently finished painting my Ork Trukk.  I am overall happy with the results, especially the red armor. This was actually the largest miniature I have ever painting, making me even happier with the results.

I hope you like it:

 All the best,


Clive

Thursday, August 11, 2011

Friends New Blog

My friend started a relatively crazy blog about wargaming, video games and other random stuff (Like double rainbows).  Anyways, I would love him to get some followers so anyone who has read this post, jump onto his blog and hit the FOLLOW button.

thedoublerainbowworkbench.blogspot.com


It would be much appreciated!

Clive


Tuesday, August 9, 2011

Painting Update: Gretchin

Gretchin!!!

I just got a new box of Gretchin in the mail and they are great little sculpts.  I spend the last few nights cutting them from their sprues, removing mould lines and flash, drilling out gun barrels, green stuffing gaps, sculpting more hats for them, and finally priming.  Now comes the fun step, PAINTING!! Hooray.

I have tried a few test models and I think these are some of the best models I’ve painted as far as Orks go.  I have changed my style of skin as well; instead of adding white to green to get a highlight I add yellow.  This makes the skin look a lot more organic. Using some Vallejo paint I tried a few new methods for cloth, red, and metal, and so far so good!

Without further ado, here they are:
Sorry guys, Didn't have time to crop the pic

UPDATE: I am leaning more towards the Vallejo line then the Citadel at the moment. Anymore input then just vote on the poll.

Sunday, August 7, 2011

Vallejo or Citadel?

I have been trying to decide a tough decision that I will be facing in the future, Vallejo Paints or Citadel? 

In my newbish hobby stages I always though that because GW made great models, they must make great tools, paints ect, if I had known that back then I would have a huge amount of money saved.  I recently bought 6 Vallejo paint along with my gretchin and I have realized that Vallejo paint are the same, if not BETTER than Citadel paints. 

Here are my reasons for using Citadel

  • The pots are quite useful as I am not a fan of pallets
  • There are a bulk of tutorial on the forums, Youtube and GW website that use GW paint, these tutorials would become useless if I were to choose Vallejo
  • They offer great postage time (under 2 weeks)
  • Guaranteed results from the eavy’ metal team

The Reasons for using Vallejo:

  • MUCH more affordable than the Citadel range ($6 Citadel-$2.52 Vallejo)
  • More paint in the bottle (Citadel 15ml-Vallejo 16ml)
  • Less brush strokes when applying paint to smooth surfaces
  • A lot more paint in the line than Citadels, meaning less paint mixing
  • Plenty of ranges; Model Color, Game Color, Washes, and Model Air
  • Holds onto the plastic better than the Citadel paints

I will be making my decision very soon and will need your help for converting. I think its best to stick with one line of paint than two at once. 

So what’s your opinion on this matter, I will be pacing a poll on the blog if people want to help me decide.

Bye for now,

Clive

Hobby Review: Dremel Stylus


Hey guys, Just bough a new tool that will be a huge change to my hobby, the Dremel stylus.  This baby is a cordless lithium-ion rotary tool that comes with a massive amount of sanders, drill bits files and more. The tool is extremely comfortable and makes it a lot easier to keep a steady hand.

I have had past experiences with cheapo $20 drills that cannot even drill though GW plastic without stopping, burning out the motor or running out of battery.  Although I have gotten refund they seemed like a waste of time.  I decided to spend a little more than just $20, and purchased this drill and man is this thing great.  I got the inspiration from a 40k Youtube channel called Catattafish, where he has a video using this exact tool, and he demonstrates everything that needs to be known for his drill.

But what was the overall point of buying this drill?  I needed it for 3 things in general, pinning, converting and especially magnetizing.  I have always been a fan of the way you add magnets to models, they can move, and the parts can be swapped whenever you want, seems like a great thing to do for model value. 
(Experimental) Magnetized Ork Boy
96 3mm x 1.5mm Magnets

Converting is a new thing for me, although with the new purchase of some kneadtide (green stuff) and this drill, I’m ready to begin.  I have already made a big Mek out of a few Assault on Black Reach parts and miscellaneous stuff inside my bits box, and in my opinion he looks fairly nice.  But he is yet to be finished…
Th Mek Conversion (sorry about the bad pic)
Really needs to be painted

Lastly, pinning, with the new installment of citadel Finecast I will not have to pin as much as I should have to, but when I rarely get a metal mini this will come in handy. I already have my pins ready (papers clips cut with sprue cutters) and all I need now is a metal mini.

The moral of this post, if you are interested in magnetizing, converting and pinning, go out to your local hardware store and pick this bad boy up because this beast is an amazing tool that comes with a huge load of accessories and a great docking station for easy charge.  Hope you guys have enjoyed this post,

Clive

Friday, May 20, 2011

Warflakes 40k Blog

Hey guys, just wanting anyone reading this blog to head over to Warflakes 40k Blog, read his posts, follow, comment, and support as he is new to the blogging community (FTW).

Clive

Finished Power Klaw Nob!!

I'm not to happy about the arrow
Ope' Ya Lyked da new nob wiv power claw.  Waaaaghh!!

Clive

Monday, May 16, 2011

Tutorial: Freehand Black Templars Symbol

Hey, guys back with a quick tutorial, my friend plays Templars and wanted to learn how to freehand the Insignia onto his Rhino's. So I drew up a few sketches and figured out a simple, easy to follow, no expertise required tutorial.

The steps are very self explanatory, so just try and copy the pics onto your model:


A simple +, as you can see my freehand ability is utterly terrible!
Join up the edges of the markings leaving a deep depression from the square to the line edge.

Simply color in the insides of the markings and your done!!!
I hope this has helped anyone out there (like my friend) doing Templars!!

Clive

Update: Rik has officially left 40k radio... ...Forever

I'm not sure if any viewers lisen to 40k radio, but I am striked with terrible news for those who do.

Unfortunately rik has left battlefoam and 40k radio. I myself will most definitely sad, and he was my favourite host
I thought it was a joke at first but this has saddened me dearly.

I will miss you rik!!!!


On ther other hand, I will have a few tutorials coming your way!!


See ya soon

Clive M

Wednesday, May 4, 2011

May the 4th be with you!!

It may the 4th, and starwars day is upon us!!

Seeya soon!

Clive

Tuesday, April 26, 2011

TUTORIAL: Painting Ork Scrap Metal

I recently announced I was going to be releasing more tutorials: well here’s my method for painting Ork Scrap Metal (Looted metal).  This method is fast, easy and leaves a nice effect to your models. I hope this helps anybody out there!

I will be using an Ork Deffcopta as an example because the model contains a lot of metal areas and will be the most suitable for this tutorial.

Step 1:
Prime the model in Black:

Step 2:
Drybrush in Boltgun Metal

Step 3:
Apply a 1:1 mix of Tin Bitz and Shining Gold to any other areas of your choice.

Step 4:
Add a darker shade to the models by painting Tin Bitz onto areas of your choice.
This step didn''t come out as good on the camera

As you can see this method is great for painting a fast but effective metal, I know this will help me paint the 3 Deffcoptas, 6 Killa Kans and 1 Deff Dread in my army.

Thanks for reading; I hope you find this as useful as I do!

Clive

Saturday, April 23, 2011

Tutorials!!


I am pleased to announce that from now on I will be posting more and more tutorials to keep you guys interested and share my knowledge with others.  You can look forward to a lot of Ork tutorials, Dark Eldar, and even smaller things like eyes, skin and some terrain.

I will try and post small tips every now and then.  These small tips will be ones that have help greatly, and aren’t hard to do. 

Another thing I will be posting will be ways to save money in the hobby.  From product reviews to preserving paints, this way you will get top notch products and equipment for a little price, saving you more and more money.

I hope these tutorials will help to expand your hobby knowledge and give you ideas for future projects; my main goal is to share what I know to all the awesome viewers out there.


Clive

Thursday, April 21, 2011

GW Ork Homepage Stuffup

This has been on the site for more than three years now, just look at these pics:

 
Click to zoom


Apparently Sauron has taken over the Deff Dread Mobs.

I hope you like this and have a laugh seeing it for yourself!!

Happy Easter and Bye Bye!!

Clive

New Banner

Check out the new banner at the top of the site.
Its the limit to my terrible skill, if anyone can make a better one it would be much appreciated.

Clive!!

Wednesday, April 20, 2011

I'm back with a Sneaky Snikrot

Hey guys, been quite busy lately but managed to fit in a small post. I just newly painted my Boss Snikrot model from 2010 Christmas, and also made a light box to get better pics for the blog.

Here it is!!
I had trouble with lenses but they turned out fine in the end!!

Thanks for looking, I'm glad to be back and hope you like him.

Clive

Sunday, January 9, 2011

Dawn of War 2: Retribution Trailer!!

Check out this new DOW Trailer.  It looks awesome!!
                                             
     That's all for now,
 
     Clive


Friday, January 7, 2011

Terrain Tutorial: Ruins


Ruins make some of the most memorable moments of playing Warhammer 40k.  Their unpredictable shapes and sizes could make the difference between winning and losing.
  
Knowing Ruins were one of the most popular pieces of terrain, I decided to post my technique for building and painting them. 

What you will need:
·           
      Styrofoam
This is just your ordinary packaging Styrofoam you would find in the box of an electronic appliance 

PVA Glue
Nothing Special, any PVA Glue will work
·          
      Pollie Filla
This product is made to fill in the gaps of a wall left by pins or nails. Any similar product will work as well
·          
      Cardboard
Preferably shoebox cardboard.  Remember this is for the base of the Ruin, so it shouldn’t be too thick.
·        
            Ordinary Sandpaper
This is only to sand down the Styrofoam, so it doesn’t have to be too strong
·          
     Black and White Paint
I just used ordinary craft paints. There’s no need to go using the expensive GW Spray Can!!
·          
      Sand
I actually got my sand from the park across the road from my house.  I use it for the bases of my minis and I really enjoy it.
As you can see most of these Items can be easily found around the house.  These ruins can be made in a very short amount of time; I made five in just one Morning. 

STEP 1:
Start by finding the right piece of Styrofoam, It can be as small or as large as you want, there’s really no limit to your imagination.

STEP 2:
Once you’ve made a choice, sand down the whole piece with your sandpaper.  Styrofoam tends to be weak, and when it comes time to paint it, parts start falling off, which is a real nuisance.

STEP 3:
Cut the piece of card board to an appropriate size to fit the Styrofoam.  Then simply glue the base to the piece of foam (with PVA Glue) and wait for it to dry.

STEP 4:
Cake the whole piece of foam with the Pollie Filla to texture it.  Then glue the sand to the base using the PVA Glue.  This will give it a nice authentic look when painted. 

STEP 5: Painting:
1.           1.  Basecoat the whole ruin (including the base), with Black Paint
2.            
         2. Then mix 1/10 Black and White, and apply this mixture to the ruin and the base with a light drybrush
3.        

                 3. Then mix an extremely (almost white) light grey and drybrush this onto the ruin and the base


 You don’t have to paint it grey.  I have a grass gaming table and grey contrasts really well with green.  You could paint the ruins like the ones over at Steevo’s Wargaming Adventure with that sandy desert look.  As I said there’s really no limit to your imagination.
These are all the ruins I've Made.

That’s all for now…

Clive